Building tesserocr on MS Windows 64bit
If you search for efficient solution of using tesseract OCR in python you will need to use tessocer. But there are no recent version of project for current version of python on windows. So you have build it by yourself.
Requirements
- cmake
- Visual Studio Community
- unzip (part of git for windows) or use windows build-in solutions
- git for windows (optional)
- curl for downloading files from internet (optional)
Installing dependencies
Project structure and initialisation of environment
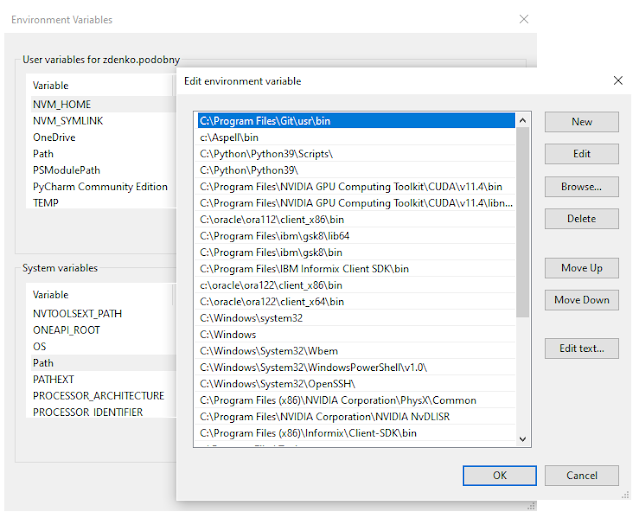
Project will be created on drive "F:" You can adjust this path to your needs.mkdir F:\win64 set INSTALL_DIR=F:\win64 set PATH=%PATH%;%INSTALL_DIR%\bin
mkdir %INSTALL_DIR%\share\tesseract\tessdataSource tree we will put its own place:
mkdir F:\Project
Initialize VS environment:
call "c:\Program Files (x86)\Microsoft Visual Studio\2019\Community\VC\Auxiliary\Build\vcvars64.bat" x64
set INCLUDE=%INCLUDE%;%INSTALL_DIR%\include
set LIBPATH=%LIBPATH%;%INSTALL_DIR%\lib
set TESSDATA_PREFIX=%INSTALL_DIR%\share\tesseract\tessdata
tessdata
This is place where the language data files are located together with common configurations. We will use tessdata repository as in contains models for legacy and LSTM engine. You can also download data from tessdata_best or tessdata_fast repository, but they have only LSTM model.
Legacy engine is better if you need to find exact location of individual characters, but has not so good accuracy as LSTM engine. Therefore some users suggest combination of both engines.
git clone --depth 1 https://github.com/tesseract-ocr/tessconfigs %TESSDATA_PREFIX%
curl -L https://github.com/tesseract-ocr/tessdata/raw/master/eng.traineddata ^
    --output %TESSDATA_PREFIX%\eng.traineddata
curl -L https://github.com/tesseract-ocr/tessdata/raw/master/osd.traineddata ^
    --output %TESSDATA_PREFIX%\osd.traineddata
Building tesseract and leptonica with dependencies
We will install only zlib and libpng because we will use Python Pillow for image opening. But you can install also other dependencies (gif, jpeg, tiff, webp) before building leptonica
zlib build and installation
F:
cd F:\Project
curl https://zlib.net/zlib1211.zip
"c:\Program Files\Git\usr\bin\unzip.exe" zlib1211.zip
cd zlib-1.2.11
cmake -Bbuild -DCMAKE_BUILD_TYPE=Release ^
    -DCMAKE_PREFIX_PATH=%INSTALL_DIR% ^
    -DCMAKE_INSTALL_PREFIX=%INSTALL_DIR%
cmake --build build --config Release --target install
cd ..
libpng build and installation
curl https://vorboss.dl.sourceforge.net/project/libpng/libpng16/1.6.37/lpng1637.zip
"c:\Program Files\Git\usr\bin\unzip.exe" lpng1637.zip
cd lpng1637
cmake -Bbuild -DCMAKE_BUILD_TYPE=Release ^
    -DCMAKE_PREFIX_PATH=%INSTALL_DIR% -DCMAKE_INSTALL_PREFIX=%INSTALL_DIR%
cmake --build build --config Release --target install
cd ..
leptonica build and installation
git clone --depth 1 https://github.com/DanBloomberg/leptonica.git
cd leptonica
cmake -Bbuild -DCMAKE_BUILD_TYPE=Release ^
   -DCMAKE_INSTALL_PREFIX=%INSTALL_DIR% -DCMAKE_PREFIX_PATH=%INSTALL_DIR% ^
   -DBUILD_PROG=OFF -DSW_BUILD=OFF -DBUILD_SHARED_LIBS=ON
cmake --build build  --config Release --target install
cd ..
tesseract build and installation
We will use the latest stable version as master (a.k.a 5.0 version) API is not stable and changing at the moment.
git clone -b 4.1.1 --depth 1 https://github.com/tesseract-ocr/tesseract.git
cd tesseract
cmake -Bbuild -DCMAKE_BUILD_TYPE=Release -DCMAKE_INSTALL_PREFIX=%INSTALL_DIR% ^
    -DCMAKE_PREFIX_PATH=%INSTALL_DIR% ^
    -DLeptonica_DIR=%INSTALL_DIR%\lib\cmake  ^
    -DBUILD_TRAINING_TOOLS=OFF -DSW_BUILD=OFF ^
    -DOPENMP_BUILD=OFF -DBUILD_SHARED_LIBS=ON
cmake --build build --config Release --target install
cd ..
tesserocr build
git clone --depth 1 https://github.com/sirfz/tesserocr.git cd tesserocrpython setup.py build python setup.py bdist_wheel pip uninstall -y tesserocr pip install dist\tesserocr-2.5.2b0-cp38-cp38-win_amd64.whlcopy F:\win64\bin\*.dll "C:\Program Files\Python38\Lib\site-packages\"(adjust based on your Python installation)
tests
cd F:\Project\tesserocr python >>> import tesserocr >>> tesserocr.PyTessBaseAPI.Version() '4.1.1' >>> tesserocr.get_languages() ('F:\\Project\\tessdata/', ['eng', 'osd']) >>> from PIL import Image >>> image = Image.open(r'F:\Project\tesserocr\tests\eurotext.png') >>> with tesserocr.PyTessBaseAPI() as api: ... api.SetImage(image) ... print(api.GetUTF8Text()) ... The (quick) [brown] {fox} jumps! Over the $43,456.78 <lazy> #90 dog & duck/goose, as 12.5% of E-mail from aspammer@website.com is spam. Der ,schnelle” braune Fuchs springt iiber den faulen Hund. Le renard brun «rapide» saute par-dessus le chien paresseux. La volpe marrone rapida salta sopra il cane pigro. El zorro marron ripido salta sobre el perro perezoso. A raposa marrom ripida salta sobre o cdo preguigoso. >>>


hello! how to compile the x86 version? thanks!
ReplyDeleteAFAIK should be sufficient to correctly set VS environment
ReplyDeleteThanks! I changed it to
Deletecall "c:\Program Files (x86)\Microsoft Visual Studio\2019\Community\VC\Auxiliary\Build\vcvars86.bat" x86
but the DLLs are the same.
For me 32bit is dead for several years... But you can try:
Deletecmake . -DCMAKE_GENERATOR_PLATFORM=x64
see: https://stackoverflow.com/questions/31148943/option-to-force-either-32-bit-or-64-bit-build-with-cmake/47983786
or:
cmake -G "Visual Studio 16 2019" -A Win32 -S \path_to_source\ -B "build32"
cmake -G "Visual Studio 16 2019" -A x64 -S \path_to_source\ -B "build64"
cmake --build build32 --config Release
cmake --build build64 --config Release
https://stackoverflow.com/questions/28350214/how-to-build-x86-and-or-x64-on-windows-from-command-line-with-cmake